

Forms are the most essential part of any website. A great-looking form with seamless transitions provides a better user experience and makes it fun to fill the form. Sometimes we stumble upon a situation where we might need to validate the form using CSS.
Gladly, CSS has grown a lot in the past few years and is capable of doing amazing kinds of stuff, without using any form validation in JavaScript. However, it involves a bit of trickery and interestingly, today we are going to use one of them to do the form validation in CSS and HTML.
But before moving further, I’d recommend you to go through this article How to make a Floating label and when you should use it. As a floating label is going to be the most integral part of completing this tutorial, where I will also show one of the CSS form validation examples.
How does the form validation in CSS and HTML work?
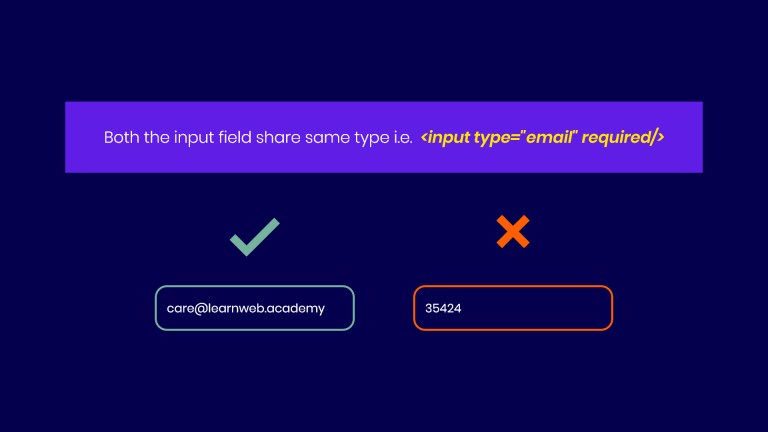
The latest CSS3 now gives us :valid :invalidselectors. The :valid selector selects form elements with a value that validates according to the element’s semantics. And the :invalid selector selects form elements with a value that does not validate according to the element’s semantics. For example, an input of an email type with a value of 35424 is invalid, but care@learnweb.academy is valid (Figure 1).
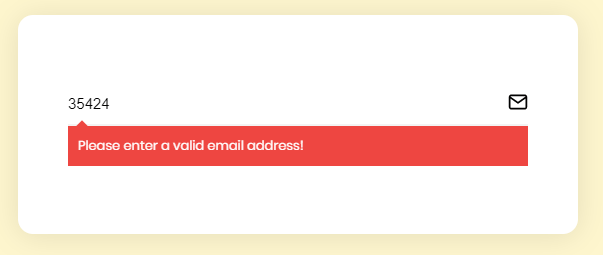
So that’s what we’re going to use to verify if the user entered the correct value. And if it’s going to be invalid, we will make the error appear and the label disappear (Figure 2).
But it’s important to note that it has some restrictions; it will only work on input elements with min and max attributes, email fields, or number fields with a numeric value, etc., and all of them must be required. So without further ado, let’s begin and validate the form using CSS.
HTML markup
The markup is similar to the one we saw in the article mentioned above, where we saw the form validation in HTML. The only thing that is going to be new is the <div class="error">, which will act as an alert if we enter something invalid.
<div class="input-text">
    <input type="email" placeholder="Enter Email" required>
    <label for=""> Enter Email</label>
    <div class="error"> Please enter a valid email address!</div>
</div>
CSS validation error
Unlike the floating label, our error will be at the bottom of the input field (Figure 2).
/** Error */
.error {
    position: absolute;
    top: 0;
    z-index: 50;
    padding: 10px;
    width: 100%;
    font-size: 13px;
    color: #fff;
    opacity: 0;
    visibility: hidden;
    transition: 0.25s all ease;
}

/** Error Arrow */
.error::after {
    content: '';
    position: absolute;
    height: 8px;
    width: 8px;
    top: -4px;
    left: 10px;
    transform: rotate(45deg);
}

/** Error Background */
.error-danger,
.error-danger::after {
    background: #ee4540;
}
Validate the form using CSS
Now, this is going to be the fun part. Here we will be combining :invalid, :not() and :placeholder-shown CSS selectors. So, technically, if the value of the input is invalid and does not display the placeholder, then we will have to run the condition. But since the error div is not an adjacent sibling of the input, we will use a general sibling selector ( ~ ).
/** Hide the label if invalid */
.input-text > input:invalid:not(:placeholder-shown) + label {
    top: 11px;
    opacity: 0;
    visibility: hidden;
}

/** Show the error if invalid */
.input-text > input:invalid:not(:placeholder-shown) ~ .error {
    opacity: 1;
    visibility: visible;
    top: 100%;
}
And that’s it. We are ready to validate the form using CSS.
Conclusion
If you found this post helpful, I would be very grateful if you would help it to spread by emailing it to a friend or sharing it on Twitter or Facebook. Thank you!
Please let me know if you have any questions in the comments.
Photo Credits: Featured Photo by Brooke Lark on Unsplash