

Netlify is one of the finest solutions for building, hosting, deploying and managing modern web projects. I have been using it for a while now, and I’m utterly fascinated with its quick, free, straightforward solutions.
In this article, I’ll show you how you can be a part of the worldwide web using the free static site hosting service of Netlify.
But remember to leverage the free static site hosting service of Netlify, you should have a Git repository. Don’t worry if you don’t have one, you can follow along with the basics of GitHub and within a few simple steps, you will be ready.
Create a Netlify account
First things first you need to create your netlify account.
You can do that just by visiting the login page of Netlify and choosing any of the given options as the login method ( Figure-1.1 ).

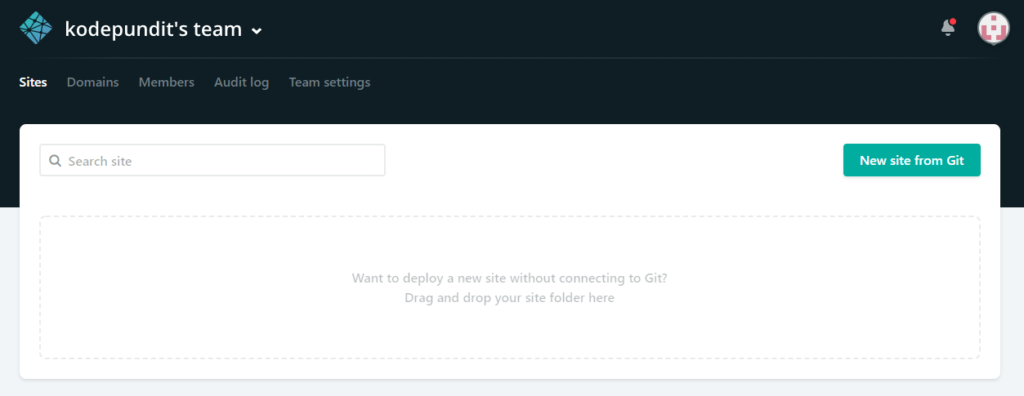
Once done you will be requested permissions from Netlify to authorize access to your Git account. After allowing it you will be redirected to the site listing page of Netlify, but since there’s nothing added yet, it should look like in the image ( Figure-1.2 ) given below:
Free static site Hosting on Netlify
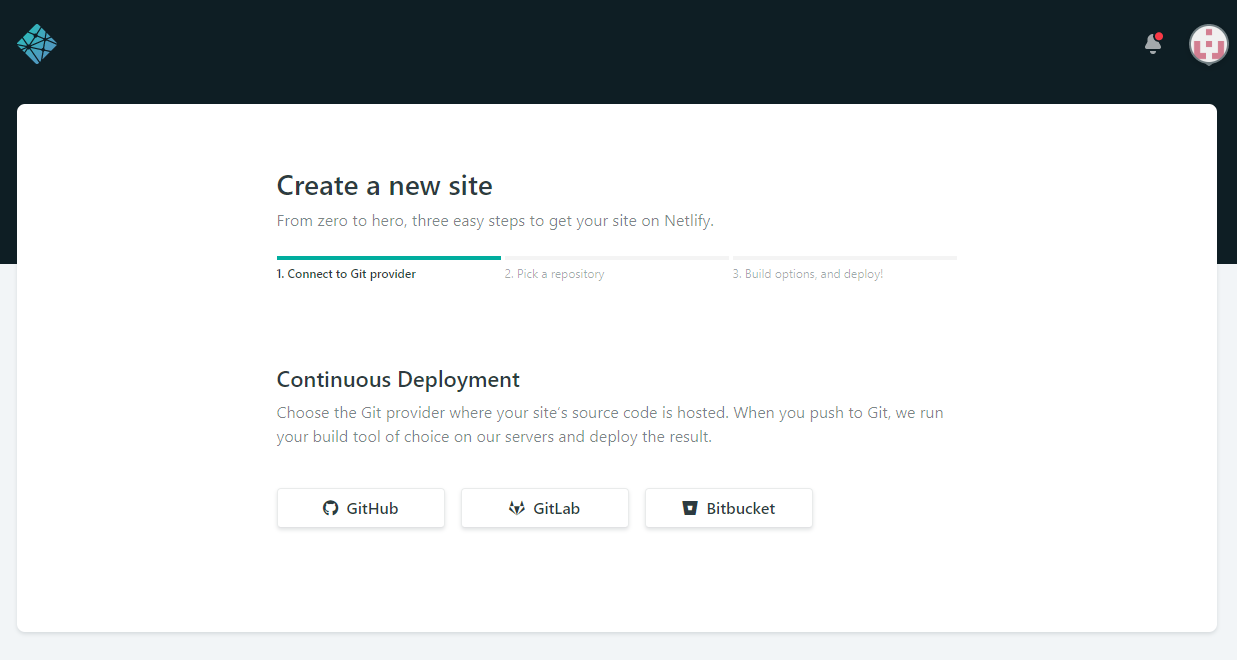
Well, now you are ready to freely host your site with a few simple clicks. Firstly, you need to click on the New site from the git button ( Figure-1.2 ) and then choose the git provider where you hosted the source code, in our case GitHub ( Figure-2.1 ).
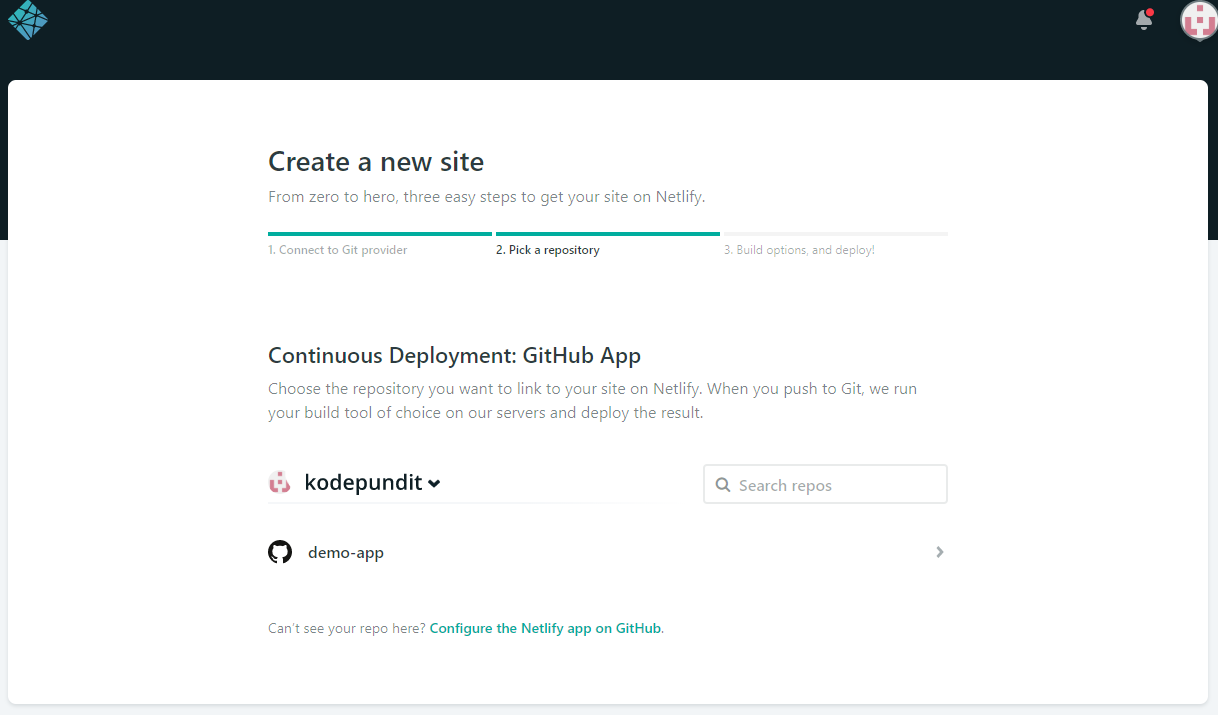
Once clicked you will be requested access to the repositories. After you have done that you can see the list of repositories hosted in your Git account. Since I want to host demo-app, I will click on it ( Figure-2.2 ).
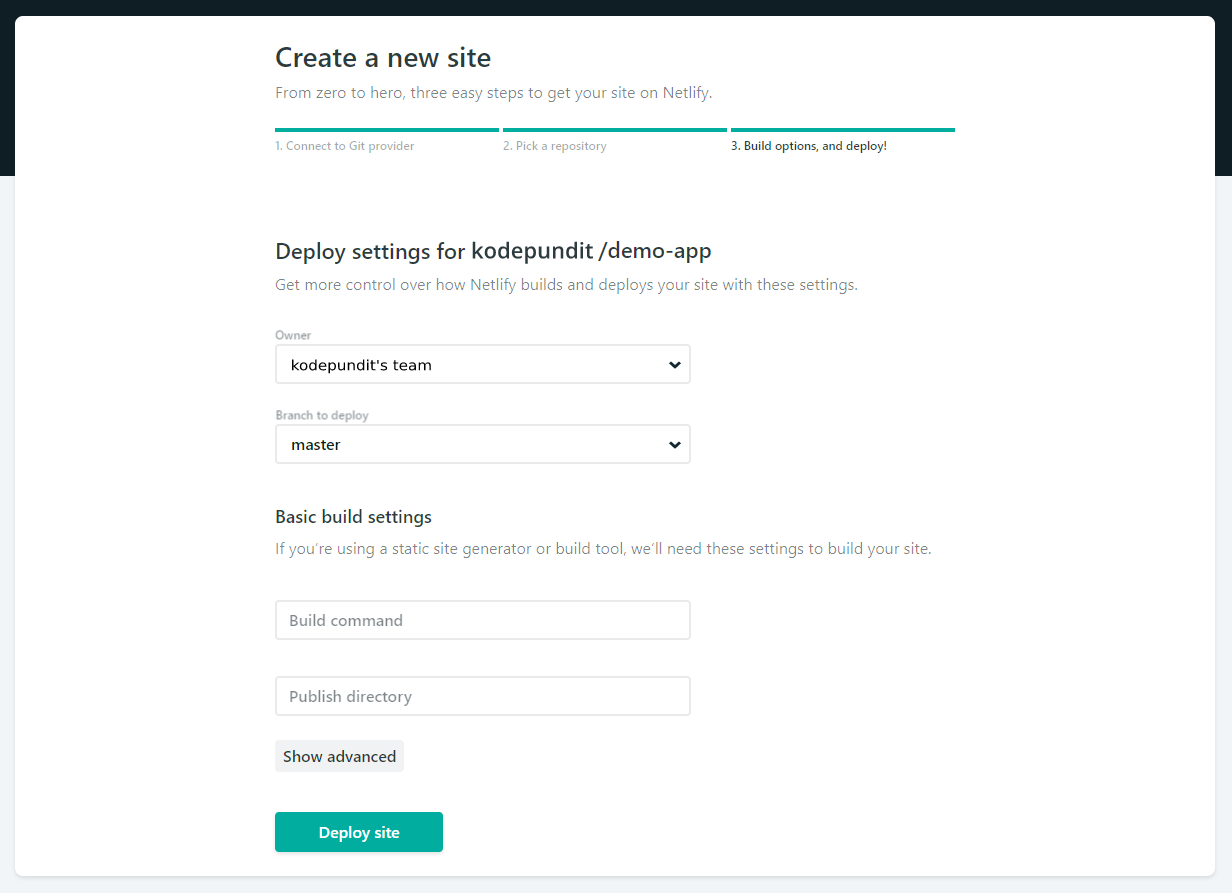
In the 3rd and final step, you need to add the build settings if you are using a static site generator, you can just leave it empty if you are not using any. Click on the deploy site button on the bottom, after configuring all the build settings ( Figure-2.3 ).
Now all you need to do is sit back and relax, while Netlify does the work for you – it will only take a few minutes.
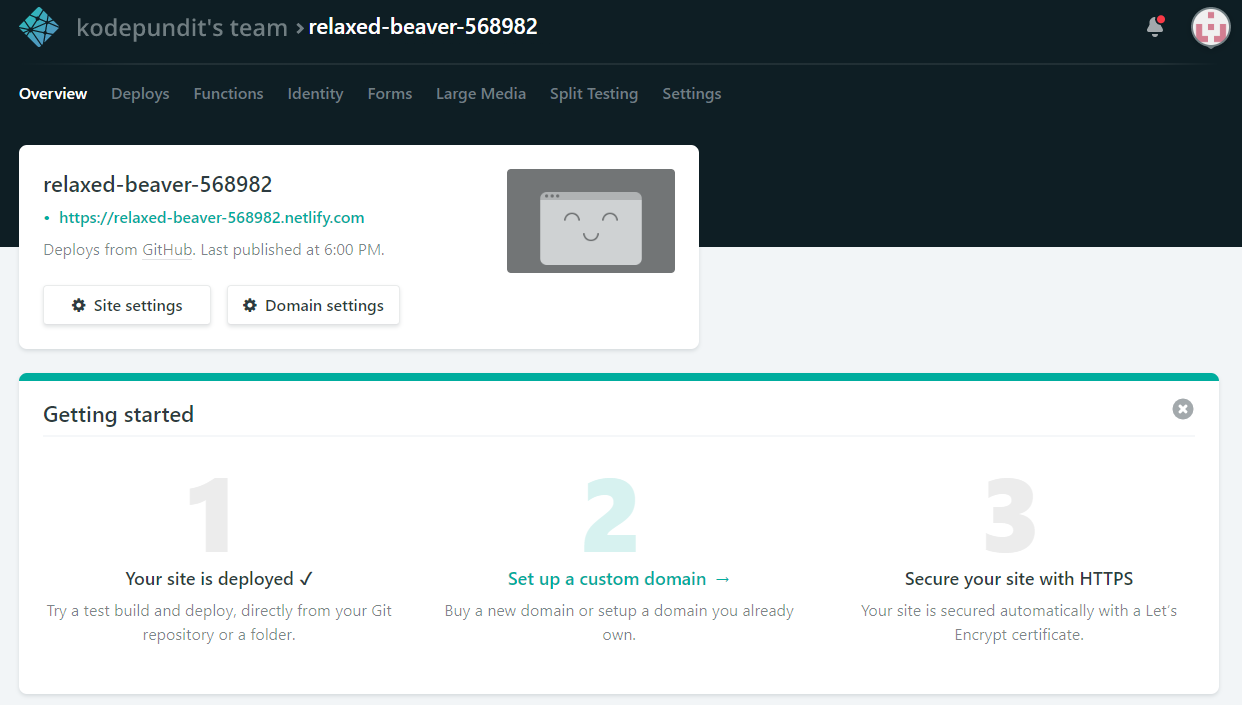
Tada! Your project is now live on a temporary domain, leveraging the free static site hosting by Netlify. Just click on the URL visible on the top left ( Figure-2.4 ). You can also update the temporary domain name or set up your own custom domain.
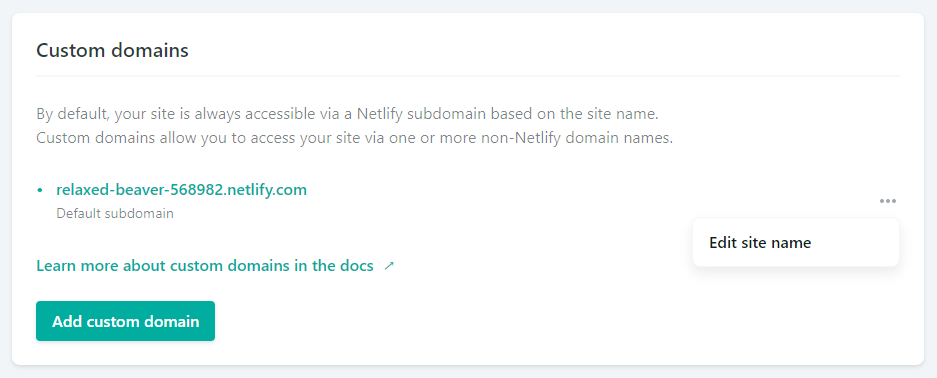
Let’s update the temporary domain, for now, to do that simply click on domain settings. Then you should be able to see the Custom domains block. Click on the three dots on the right of the temporary domain and edit the site name and save ( Figure-2.5 ).
Conclusion
Hosting your site to the server can cost you and might seem like a confusing mess but well wasn’t this easy? I hope you have enjoyed using the free static site hosting service of Netlify.
Did you find this blog post helpful? If so, whom could you share it with?
Photo Credits: Featured Image by Free Vector